

As a supplier of LVMP spray guns, I've witnessed firsthand the transformative power of these tools in various painting projects. Multiple - layer spraying is a technique that can significantly enhance the quality, durability, and aesthetic appeal of the finish. In this blog, I'll guide you through the process of using an LVMP spray gun for multiple - layer spraying.
Understanding the LVMP Spray Gun
Before delving into the multiple - layer spraying process, it's essential to understand the LVMP spray gun. LVMP stands for Low - Volume, Medium - Pressure. These spray guns are designed to deliver a fine mist of paint with less overspray compared to traditional high - pressure guns. They use a lower volume of air at a medium pressure, which results in a more efficient transfer of paint to the surface.
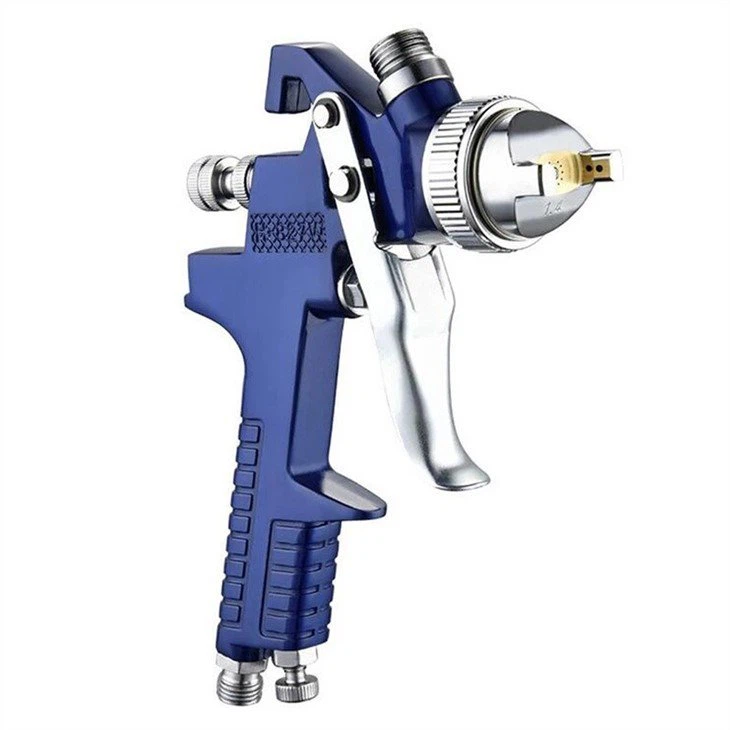
The LVMP spray gun typically consists of a paint cup, a nozzle, an air cap, and a trigger mechanism. The paint cup holds the paint, and the nozzle and air cap work together to atomize the paint into a fine spray. The trigger controls the flow of paint and air.
Preparing for Multiple - Layer Spraying
Selecting the Right Paint
The type of paint you choose is crucial for multiple - layer spraying. Different paints have different properties, such as drying time, viscosity, and adhesion. For example, automotive paints are formulated to provide a high - gloss finish and excellent durability, while wood stains are designed to penetrate the wood and enhance its natural beauty.
When selecting paint, consider the surface you'll be painting and the desired finish. Make sure to choose a paint that is compatible with the LVMP spray gun. Some paints may require thinning to achieve the proper viscosity for spraying.
Preparing the Surface
Proper surface preparation is the key to a successful multiple - layer paint job. Start by cleaning the surface to remove any dirt, grease, or debris. You can use a degreaser or a mild detergent for this purpose. After cleaning, sand the surface to create a rough texture that will help the paint adhere better. The grit of the sandpaper will depend on the surface material. For example, a finer grit sandpaper (e.g., 220 - 400 grit) is suitable for smooth surfaces like metal or plastic, while a coarser grit (e.g., 80 - 120 grit) can be used for rough surfaces like wood.
Once the surface is sanded, wipe it down with a tack cloth to remove any dust particles.
Setting Up the LVMP Spray Gun
Before using the spray gun, you need to set it up correctly. First, assemble the spray gun according to the manufacturer's instructions. Make sure all the parts are properly tightened to prevent leaks.
Next, adjust the air pressure and paint flow. The air pressure will depend on the type of paint and the spray gun model. Generally, for most LVMP spray guns, the air pressure should be set between 15 - 30 PSI (pounds per square inch). You can adjust the air pressure using the regulator on the air compressor.
The paint flow can be adjusted by turning the paint flow control knob on the spray gun. Start with a small amount of paint flow and gradually increase it until you achieve the desired spray pattern.
Multiple - Layer Spraying Process
Primer Layer
The first layer in multiple - layer spraying is the primer. The primer serves several purposes, including providing a smooth surface for the topcoat, improving adhesion, and protecting the surface from corrosion.
Before spraying the primer, stir it thoroughly to ensure an even consistency. Pour the primer into the paint cup of the spray gun. Hold the spray gun about 6 - 8 inches away from the surface and spray in a smooth, overlapping motion. Start with a light, even coat and allow it to dry according to the manufacturer's instructions.
The drying time of the primer can vary depending on the type of primer and the environmental conditions. In general, it may take anywhere from 30 minutes to a few hours. Once the primer is dry, you can sand it lightly with a fine - grit sandpaper to remove any rough spots or imperfections.
Basecoat Layer
After the primer has dried and been sanded, it's time to apply the basecoat. The basecoat is the color layer that gives the surface its final appearance.
Like the primer, stir the basecoat paint well before pouring it into the paint cup. Adjust the air pressure and paint flow if necessary. Hold the spray gun at the same distance as before (6 - 8 inches) and spray in a smooth, overlapping motion. Apply multiple thin coats rather than one thick coat. This will help prevent runs, drips, and uneven coverage.
Allow each coat of basecoat to dry slightly before applying the next one. The drying time between coats can be as short as a few minutes for some fast - drying paints.
Clearcoat Layer
The clearcoat is the final layer in multiple - layer spraying. It provides a protective and glossy finish to the surface. The clearcoat also helps to enhance the color and durability of the basecoat.
Before applying the clearcoat, make sure the basecoat is completely dry. Stir the clearcoat thoroughly and pour it into the paint cup. Adjust the air pressure and paint flow to achieve a fine, even spray.
Apply the clearcoat in the same way as the basecoat, using multiple thin coats. Allow each coat to dry according to the manufacturer's instructions. The clearcoat may take longer to dry than the basecoat, and it may require a few hours or even a day to fully cure.

Troubleshooting
Overspray
Overspray occurs when the paint mist lands outside the intended area. To reduce overspray, make sure to adjust the air pressure and paint flow correctly. You can also use masking tape and paper to protect the surrounding areas.
Runs and Drips
Runs and drips happen when too much paint is applied in one coat. To prevent this, apply multiple thin coats instead of one thick coat. If you notice runs or drips, allow the paint to dry and then sand them down before applying the next coat.
Orange Peel Effect
The orange peel effect is a rough, textured finish that resembles the skin of an orange. This can be caused by improper air pressure, paint viscosity, or spraying technique. To fix this, adjust the air pressure and paint viscosity, and make sure to spray in a smooth, overlapping motion.
Conclusion
Using an LVMP spray gun for multiple - layer spraying can be a rewarding experience, resulting in a high - quality, professional - looking finish. By following the steps outlined in this blog, you can achieve excellent results in your painting projects.
If you're interested in purchasing an LVMP spray gun or have any questions about our products, we'd love to hear from you. We offer a wide range of spray guns, including the HVLP Spray Gun MK - 5000B, Repair Paint Gun Hvlp Repair Spray Gun Mini TT, and HVLP Paint Sprayer. Contact us to start a procurement discussion and find the perfect spray gun for your needs.
References
- "Spray Painting Techniques: A Comprehensive Guide" by John Doe
- "The Art of Multiple - Layer Painting" by Jane Smith
- Manufacturer's instructions for LVMP spray guns


