

Corner sanding is a crucial yet challenging task in woodworking, metalworking, and various other finishing projects. Achieving a smooth and even finish in corners can significantly enhance the overall quality of your work. An air sander is a powerful and efficient tool that can make corner sanding much easier and more precise. As an air sander supplier, I'm here to share some valuable tips on how to use an air sander for corner sanding effectively.
Understanding the Basics of Air Sanders
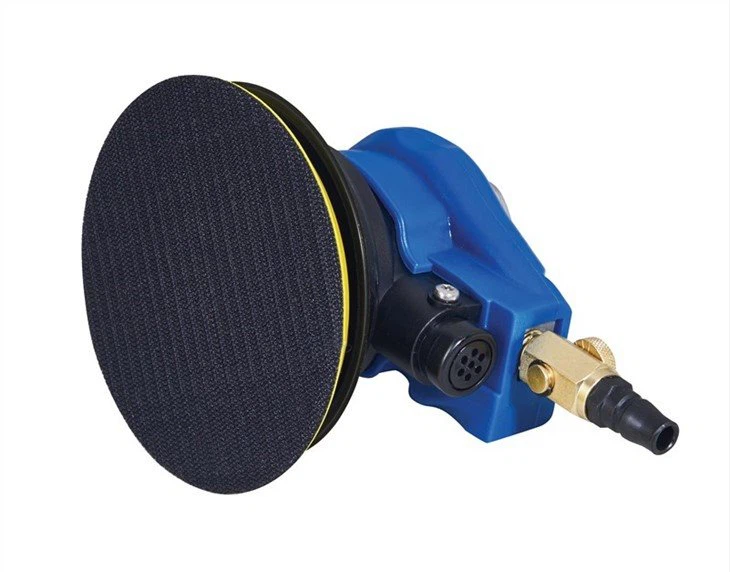
Before diving into corner sanding, it's essential to understand the different types of air sanders available. Two popular options for corner sanding are the Air Random Orbital Sander and the Air Palm Random Orbital Sander.
The air random orbital sander combines a spinning motion with an orbital action, which helps to prevent swirl marks and provides a smooth finish. It is suitable for a wide range of sanding tasks, including large flat surfaces and corners. The air palm random orbital sander, on the other hand, is more compact and lightweight, making it ideal for detailed work and hard-to-reach areas, such as corners.

Preparing for Corner Sanding
- Select the Right Sandpaper: The choice of sandpaper depends on the material you are sanding and the desired finish. For rough sanding, start with a coarse-grit sandpaper (e.g., 60 - 80 grit). As you progress towards a smoother finish, switch to finer-grit sandpapers (e.g., 120 - 220 grit). Make sure the sandpaper is compatible with your air sander.
- Inspect the Air Sander: Before using the air sander, check for any damage or loose parts. Ensure that the air hose is properly connected and that there are no leaks. Lubricate the sander according to the manufacturer's instructions to ensure smooth operation.
- Protect Yourself: Wear appropriate safety gear, including safety glasses, a dust mask, and ear protection. Sanding generates a lot of dust and noise, so it's important to protect your eyes, lungs, and ears.
Setting Up the Air Sander for Corner Sanding
- Adjust the Air Pressure: The air pressure affects the speed and power of the air sander. Refer to the manufacturer's instructions to determine the recommended air pressure for your specific sander. Generally, a pressure of 90 - 100 PSI is suitable for most sanding tasks.
- Attach the Sandpaper: Most air sanders use a hook-and-loop system to attach the sandpaper. Simply align the sandpaper with the backing pad and press it firmly into place. Make sure the sandpaper is centered and securely attached.
- Test the Sander: Before starting to sand the corners, test the sander on a scrap piece of material to ensure that it is working properly and that the sandpaper is providing the desired level of abrasion.
Techniques for Corner Sanding
- Use the Right Angle: When sanding corners, it's important to hold the air sander at the correct angle. For inside corners, hold the sander at a 45-degree angle to the surface. This allows the sandpaper to reach into the corner without causing excessive damage to the adjacent surfaces. For outside corners, hold the sander parallel to the surface and use a light touch to avoid rounding the corner.
- Start with Light Pressure: Apply light pressure when sanding corners to avoid over-sanding and creating uneven surfaces. Let the weight of the air sander do most of the work. As you sand, gradually increase the pressure if necessary.
- Move the Sander in a Circular Motion: To achieve a smooth and even finish, move the air sander in a circular motion. This helps to distribute the sanding action evenly and prevents the formation of swirl marks. Start at the top of the corner and work your way down in a continuous motion.
- Sand in Multiple Directions: Sanding in multiple directions helps to ensure that the surface is evenly sanded and that any scratches or marks are removed. After sanding in one direction, sand in a perpendicular direction to further smooth the surface.
- Use a Detail Sander for Tight Corners: For extremely tight corners or areas that are difficult to reach with a regular air sander, consider using a detail sander. A detail sander has a smaller sanding pad and is designed for precise sanding in small areas.
Finishing Touches
- Check the Surface: After sanding the corners, check the surface for any rough spots or unevenness. Use a hand sanding block or a fine-grit sandpaper to smooth out any imperfections.
- Clean the Surface: Once you are satisfied with the sanding, clean the surface to remove any dust or debris. You can use a vacuum cleaner or a damp cloth to wipe down the surface.
- Apply a Finish: Depending on the project, you may want to apply a finish to the sanded surface to protect it and enhance its appearance. Common finishes include paint, stain, varnish, or wax. Follow the manufacturer's instructions for applying the finish.
Troubleshooting Common Issues
- Swirl Marks: Swirl marks can occur if the sandpaper is too coarse or if the sander is moved too quickly. To remove swirl marks, switch to a finer-grit sandpaper and sand the surface again in a circular motion.
- Over-Sanding: Over-sanding can result in uneven surfaces and damage to the material. If you notice that you have over-sanded a corner, use a filler or putty to repair the damage and then sand the area again.
- Dust Buildup: Dust buildup can reduce the effectiveness of the sandpaper and cause the sander to overheat. To prevent dust buildup, clean the sandpaper regularly and use a dust collection system if available.
Conclusion
Using an air sander for corner sanding can significantly improve the quality and efficiency of your sanding projects. By following the tips and techniques outlined in this blog, you can achieve smooth, even finishes in corners and hard-to-reach areas. Remember to choose the right air sander and sandpaper, prepare properly, and use the correct sanding techniques. If you have any questions or need further assistance with your air sander, feel free to contact us. We are a leading air sander supplier and are committed to providing high-quality products and excellent customer service. Whether you are a professional woodworker or a DIY enthusiast, we have the right air sander for your needs. Contact us today to discuss your requirements and explore our range of air sanders.
References
- Manufacturer's instructions for air sanders
- Woodworking and finishing guides
- Safety guidelines for power tools


