

Hey there! As a supplier of LVMP Spray Guns, I know how crucial it is to clean these tools properly. A well - cleaned spray gun not only ensures a smooth and even finish on your painting projects but also extends the lifespan of the gun itself. In this blog, I'll walk you through the step - by - step process of cleaning your LVMP Spray Gun correctly.
Why Cleaning Your LVMP Spray Gun is a Big Deal
Before we dive into the cleaning process, let's talk about why it's so important. When you use an LVMP Spray Gun, paint residue can build up inside the gun. Over time, this can clog the nozzle, needle, and other crucial parts. A clogged gun won't spray paint evenly, which means you'll end up with an uneven finish on your project. Also, if you don't clean your gun regularly, the paint can dry and harden, making it even more difficult to clean later. And let's not forget that a dirty gun can break down faster, which means you'll have to spend more money on repairs or a new gun.

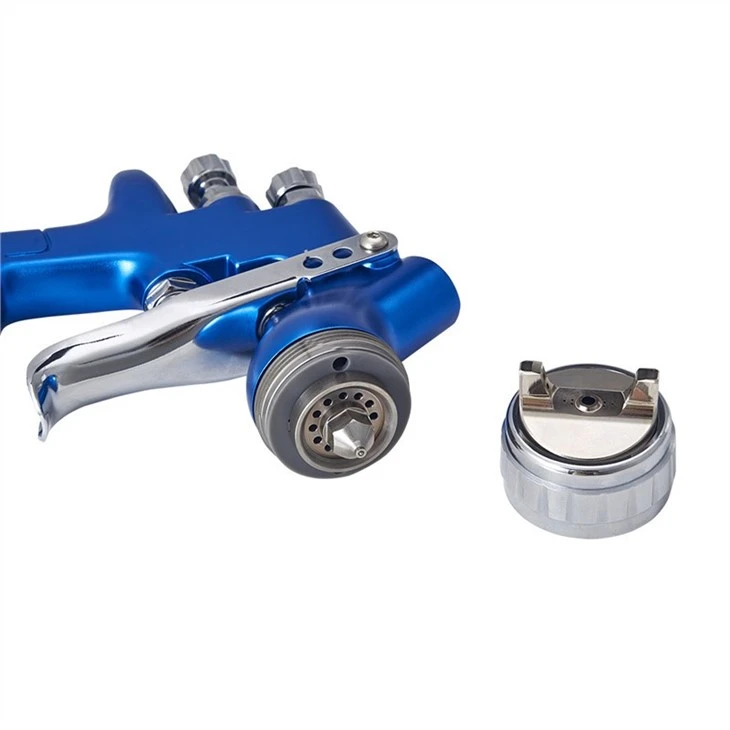
What You'll Need
To clean your LVMP Spray Gun, you'll need a few basic tools and supplies:
- Cleaning Solvent: You can use a paint - specific solvent. Make sure to choose one that's compatible with the type of paint you've been using.
- A Container: A small bucket or a container big enough to soak the gun parts.
- Cleaning Brushes: You'll need different sizes of brushes to clean the various parts of the gun. A small, stiff brush is great for getting into tight spaces.
- Lint - Free Cloths: These are essential for drying the gun parts after cleaning.
- Gloves and Safety Glasses: Always protect your hands and eyes when working with cleaning solvents.
Step - by - Step Cleaning Process
Step 1: Disassemble the Gun
The first thing you need to do is turn off the air supply and remove the paint cup from the gun. Then, carefully disassemble the gun. Start by removing the nozzle, needle, and any other removable parts. Make sure to keep all the parts organized, so you know where they go when it's time to reassemble the gun.
Step 2: Soak the Parts
Once you've disassembled the gun, place the parts in the container filled with cleaning solvent. Let them soak for about 15 - 20 minutes. This will help loosen the paint residue. While the parts are soaking, you can start cleaning the outside of the gun body with a cloth dampened with the cleaning solvent.
Step 3: Brush the Parts
After soaking, take each part out of the solvent one by one and use the cleaning brushes to scrub away the paint. Pay special attention to the nozzle and the needle. The nozzle is where the paint comes out, so it's crucial to keep it clean. Use a small brush to clean the tiny holes in the nozzle. For the needle, make sure to clean the entire length, as any paint buildup can affect the gun's performance.
Step 4: Rinse the Parts
Once you've brushed all the parts, rinse them thoroughly with clean water. This will remove any remaining solvent and paint particles. Make sure to dry the parts with a lint - free cloth right away to prevent rusting.
Step 5: Reassemble the Gun
After all the parts are clean and dry, it's time to reassemble the gun. Start by inserting the needle, then attach the nozzle. Make sure all the parts are properly tightened, but don't over - tighten them, as this can damage the gun. Finally, reattach the paint cup and turn on the air supply to test the gun.
Tips for Maintaining Your LVMP Spray Gun
- Clean After Every Use: Even if you've only used the gun for a short time, it's a good idea to clean it right away. This will prevent paint from drying and hardening inside the gun.
- Store the Gun Properly: When you're not using the gun, store it in a clean, dry place. You can also use a gun case to protect it from dust and damage.
- Inspect the Gun Regularly: Check the gun for any signs of wear and tear, such as leaks or loose parts. If you notice any problems, fix them right away.
Different Types of LVMP Spray Guns and Their Cleaning Considerations
We offer different types of spray guns, like the HVLP Spray Gun MK - 5000B and the Mini HVLP Spray Gun. While the basic cleaning process is the same for all LVMP spray guns, there are a few differences to keep in mind.
The HVLP Spray Gun MK - 5000B is a high - performance gun. It has a more complex design, which means there are more parts to clean. When disassembling this gun, be extra careful not to lose any small parts. Also, because it's a high - end gun, use high - quality cleaning solvents to ensure a thorough clean.
The Mini HVLP Spray Gun is smaller and more portable. Its parts are also smaller, so you'll need smaller cleaning brushes to get into the tight spaces. But don't let its size fool you; it still needs to be cleaned properly to perform at its best.
Conclusion
Cleaning your LVMP Spray Gun properly is not only easy but also essential for getting the best results from your painting projects. By following the steps I've outlined in this blog, you can keep your gun in top condition for years to come.
If you're in the market for a new spray gun or need more information about our products, don't hesitate to reach out. We're here to help you find the perfect spray gun for your needs and provide you with all the support you need to keep it working great.
References
- Painting Equipment Handbook: A Guide to Spray Guns and Their Maintenance
- Professional Painter's Guide to Spray Gun Care and Cleaning


